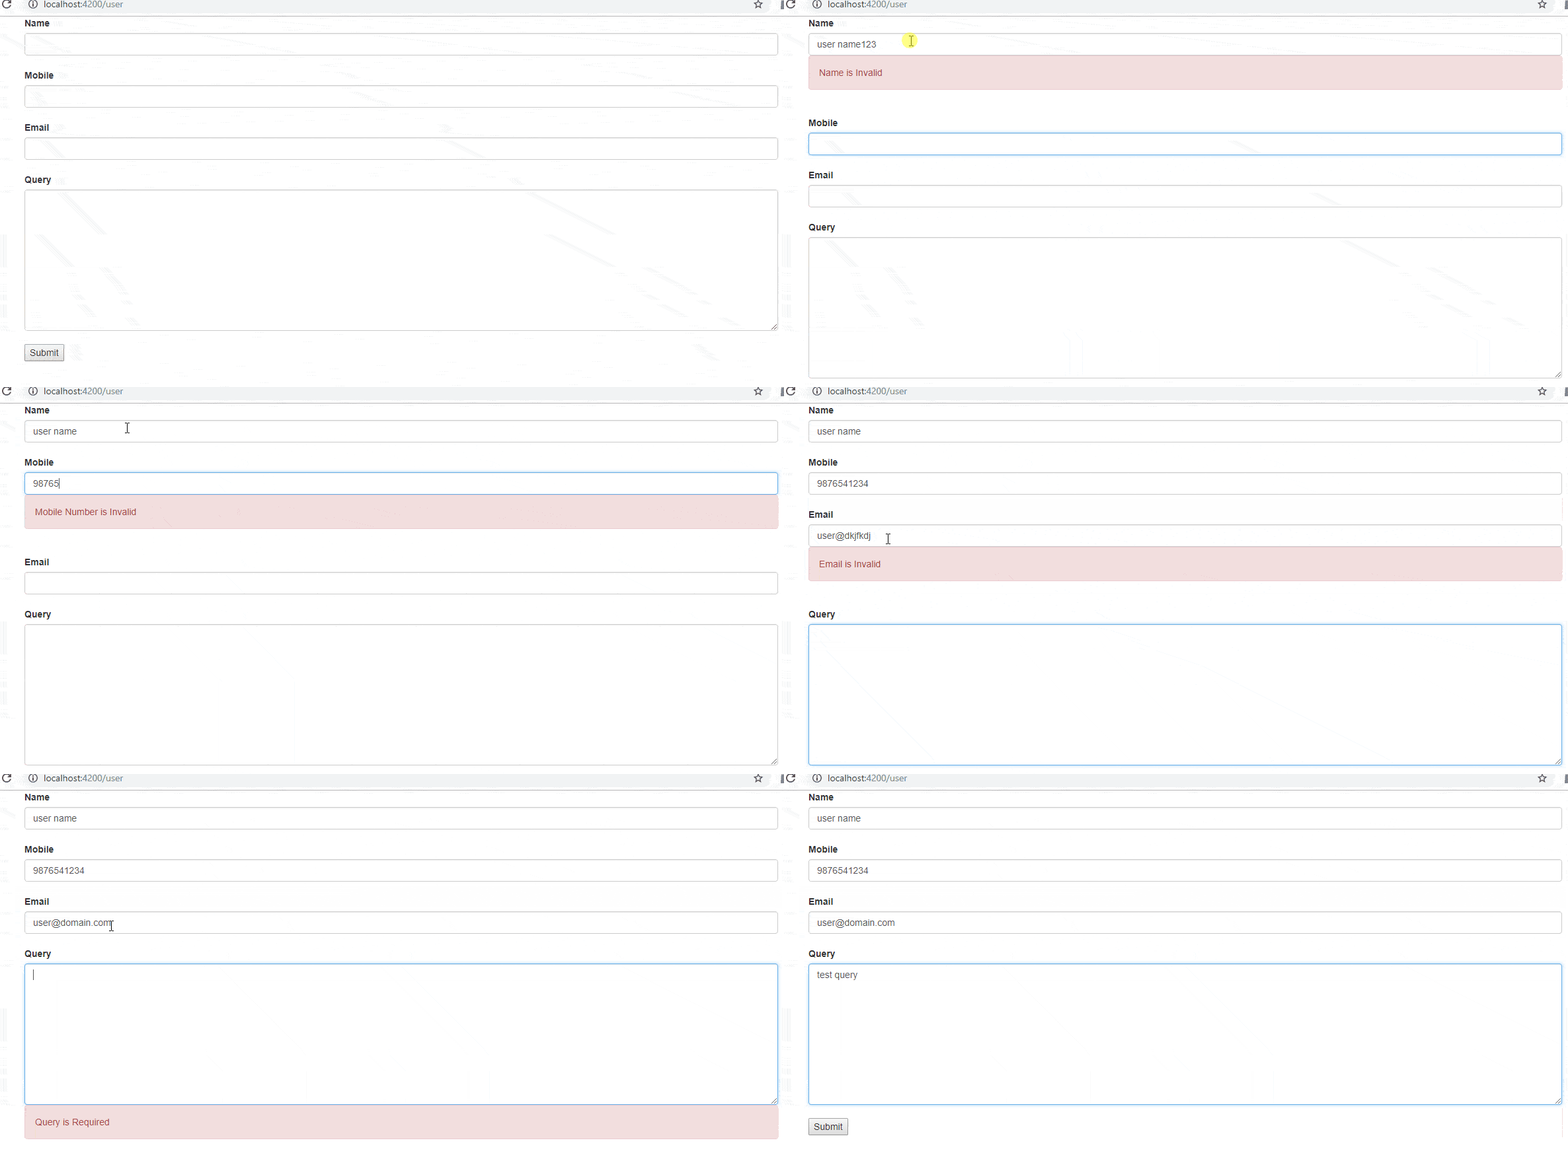
In this blog, we will learn about Template driven and Reactive Forms in Angular. Angular provides more than one way to build forms for user input and form validation.
Template-driven Approach
In the template-driven approach, Forms input and Forms validation logic go into the component’s HTML file only. The template-driven approach is fine for small or medium-level projects. But, if we are working on a huge project, then we must go for the Reactive form approach which we will see later in this blog.
Form Validation is used to improve the quality of input data by the user.
Read:- Angular Interview Questions
Template Driven approach implementation
We will create a new component in our Angular App. Let’s say user-reg. To create a component use the below command.
ng g c /formexample/user-reg
Go to the root module and import FormsModule as shown below –
import {FormsModule} from ‘@angular/forms’
and
imports: [
BrowserModule,
AppRoutingModule,
FormsModule
],
user-reg.component.html file code
<form action=“” method=“POST” #frm=“ngForm”>
<div class=“form-group”>
<label for=“”>Name</label>
<input type=“text” name=“name” class=“form-control” [(ngModel)]=“name” #nam=“ngModel”
pattern=“[a-z ]+” required>
<div *ngIf=“nam.invalid && (nam.dirty || nam.touched)“ class=“alert alert-danger”>
<div *ngIf=“nam.errors.required”>
Name is Required
</div>
<div *ngIf=“nam.errors.pattern”>
Name is Invalid
</div>
</div>
<br>
<label for=“”>Mobile</label>
<input type=“text” name=“Mobile” class=“form-control” [(ngModel)]=“mobile”
#mob=“ngModel” required pattern=“[6-9]+[0-9]{9}”>
<div *ngIf=“mob.invalid && mob.touched” class=“alert alert-danger”>
<div *ngIf=“mob.errors.required”>
Mobile is Required
</div>
<div *ngIf=“mob.errors.pattern”>
Mobile Number is Invalid
</div>
</div>
<br>
<label for=“”>Email</label>
<input type=“text” name=“Email” class=“form-control” [(ngModel)]=“email”
#email1=“ngModel” required pattern=“[a-z0-9._%+-]+@[a-z0-9.-]+.[a-z]{2,6}$”>
<div *ngIf=“email1.invalid && email1.touched” class=“alert alert-danger”>
<div *ngIf=“email1.errors.required”>
Emaile is Required
</div>
<div *ngIf=“email1.errors.pattern”>
Email is Invalid
</div>
</div>
<br>
<label for=“”>Query</label>
<textarea name=“query” id=“” cols=“30” rows=“10” class=“form-control”
[(ngModel)]=“userquery” #uquery=“ngModel” required></textarea>
<div *ngIf=“uquery.invalid && uquery.touched” class=“alert alert-danger”>
<div *ngIf=“uquery.errors.required”>
Query is Required
</div>
</div>
<br>
<button>Submit</button>
</div>
</form>
Touched and Dirty check on input control is to prevent errors from showing until the user does one of 2 things –
Changes the Value and setting the control to touch.
Reactive Form Approach
In the Reactive Form approach, the validation function is written in the component class. Angular calls this function whenever there is a change of value in the input control.
The reactive Form Approach is the best practice if we are working on a big Angular project.
Reactive Form approach implementation
In the Reactive form approach, we have to import ReactiveFormsModule along with FormsModule
import {FormsModule,ReactiveFormsModule} from ‘@angular/forms’;
and
imports: [
BrowserModule,
AppRoutingModule,
FormsModule,
ReactiveFormsModule
],
Import FormGroup, FormBuilder and Validators in user-reg.component.ts file
import { FormGroup,FormBuilder,Validators } from ‘@angular/forms’;
Below is the UserRegComponent class
First, declare a property userForm of type FormGroup
Initialize FormBuilder in the constructor.
Create a method with the name FromValidation(), you can give any name.
Write the logic inside this function and call this function within ngOnInit()
export class UserRegComponent implements OnInit {
userForm:FormGroup;
constructor(private userFrmB:FormBuilder) { }
FormValidation()
{
this.userForm = this.userFrmB.group
(
{
‘name’:[”,Validators.required],
‘mobile’:[”,Validators.compose
(
[Validators.required, Validators.pattern(“[6-9][0-9]{9}”)]
)],
’email’:[”,Validators.required]
}
)
}
ngOnInit() {
this.FormValidation();
}
}
user-reg.component.html
Use an attribute [formGroup] on <form> tag
Give a formControlName to all input fields as shown below.
<form action=“” method=“POST” [formGroup]=“userForm”>
<div class=“form-group”>
<label for=“”>Name</label>
<input type=“text” name=“name” class=“form-control” formControlName=“name”>
<div *ngIf=“userForm.controls.name.invalid && (userForm.controls.name.dirty ||
userForm.controls.name.touched)” class=“alert alert-danger”>
<div *ngIf=“userForm.controls.name.errors.required”>
Name is Required
</div>
</div>
<br>
<label for=“”>Mobile</label>
<input type=“text” name=“Mobile” class=“form-control” formControlName=“mobile”>
<div *ngIf=“userForm.controls.mobile.invalid && (userForm.controls.mobile.touched ||
userForm.controls.mobile.dirty)” class=“alert alert-danger”>
<div *ngIf=“userForm.controls.mobile.errors.required”>
Mobile is Required
</div>
<div *ngIf=“userForm.controls.mobile.errors.pattern”>
Mobile is Invalid
</div>
</div>
<br>
<label for=“”>Email</label>
<input type=“text” name=“Email” class=“form-control” formControlName=“email”>
<div *ngIf=“userForm.controls.email.invalid && (userForm.controls.email.touched ||
userForm.controls.email.dirty)” class=“alert alert-danger”>
<div *ngIf=“userForm.controls.email.errors.required”>
Email is Required
</div>
</div>
<br>
<input type=“submit” value=“Submit” [disabled]=“userForm.invalid”>
</div>
</form>

